TDD/장고걸스 튜토리얼
참고
| > 장고걸스 튜토리얼 (Django Girls Tutorial) |
|---|
| > 클린 코드를 위한 테스트 주도 개발(파이썬을 이용한) - Obey the Testing Goat! : Test-Driven Development with Python |
| > YouTube- Coding is for girls |
| > 관련 코드 git |
환경 설정
기본 환경 설정
1) 기본 환경
| OS 환경 | Ubuntu 16.04 LTS |
|---|---|
| python | 3.6.2 |
| pycharm | community 2016.3 무료버전 |
| 쉘 | zsh + oh-my-zsh |
- pycharm - 무료버전은 pycharm-community를 사용한다.
➜ sudo snap install [pycharm-professional|pycharm-community] --classic
2) .gitignore
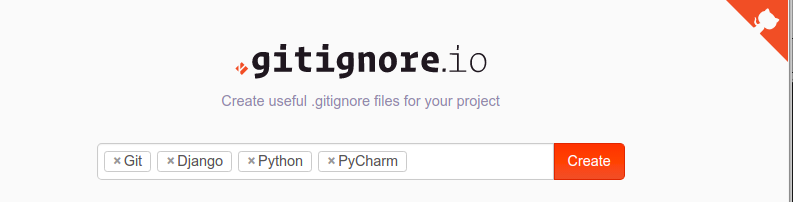
- gitignore.io를 이용한다.
- 입력창에
Git,Django,Python,Pycharm을 입력하고, create탭을 누르면 .gitignore 내용이 출력된다. - .gitignore에 다음 내용을 추가한다.
➜  vi .gitignore

# custom
.idea/
.config_secret/
.static_root/
.media/

# Created by https://www.gitignore.io/api/git,python,django,pycharm

### Django ###
3) git
➜  echo "# TDD와 함께하는 Django Girls Tutorial" > README.md
➜  git init
➜  git add README.md
➜  git commit -m "first commit"
➜  git remote add origin git@github.com:ehfgk78/TDD_DjangoGirls_Tutorial.git
➜  git push origin master
4) pyenv 가상환경
➜  pyenv virtualenv 3.6.2 TDD
➜  pyenv local TDD
(TDD) ➜ git:(master) ✗
5) requirements.txt
➜ pip list > requirements.txt
6) 현재 까지의 폴더 구조
< project Container>
    ├─ .git/
    ├─ .gitignore
    ├─ .idea/
    ├─ .python-version
    ├─ requirements.txt
    └─ functional_tests.py
Selenium
Install Chrome, ChromeDriver and Selenium on Ubuntu 16.04 · GitHub
1) Selenium 설치
➜  pip install selenium

Successfully installed selenium-3.8.1
2) install Google Chrome for Debian/Ubuntu
➜  sudo apt-get install libxss1 libappindicator1 libindicator7
➜  wget https://dl.google.com/linux/direct/google-chrome-stable_current_amd64.deb

➜  sudo dpkg -i google-chrome*.deb
➜  sudo apt-get install -f

# Now, let’s install xvfb so we can run Chrome headlessly
➜  sudo apt-get install xvfb
3) webdriver 다운로드 - ❶ Chrome ❷ PhantomJS
# 아래와 같이 커맨드 라인으로 설치할 수 있다.
➜  sudo apt-get install unzip

➜  wget -N http://chromedriver.storage.googleapis.com/2.26/chromedriver_linux64.zip
➜  unzip chromedriver_linux64.zip
➜  chmod +x chromedriver

➜  sudo mv -f chromedriver /usr/local/share/chromedriver
➜  sudo ln -s /usr/local/share/chromedriver /usr/local/bin/chromedriver
➜  sudo ln -s /usr/local/share/chromedriver /usr/bin/chromedriver
functional test (Django 설치 전)
- 요약하여 FT (Functional Test)로 한다.
1) functional_tests.py 작성
from selenium import webdriver

# 크롬 브라우저 선택
browser = webdriver.Chrome("path-to/크롬드라이버")
# URL 입력
browser.get('http://localhost:8000')

# test: <title>에 'Django'문자열이 있는가?
assert 'Django' in browser.title
2) Django 설지 전 FT - 당연히 Error가 발생한다.
➜  python functional_tests.py

Traceback (most recent call last):
  File "functional_tests.py", line 6, in <module>
    assert 'Django' in browser.title
AssertionError
django 프로젝트 시작
1) Django 설치
➜ pip install django
2) 프로젝트 시작 - 장고걸스 튜토리얼 과 다른 폴더 구조를 만들 것이다.
# (장고걸스 튜토리얼) ➜  django-admin.py startproject mysite .
➜  django-admin.py startproject mysite
3) 디렉토리 구조
< project Container> # 프로젝트 컨테이너 폴더 : 현재 source root임
├── .git/
├── .gitignore
├── .idea/
├── .python-version
├── README.md
├── functional_tests.py
├── mysite  # 프로젝트 폴더 ➝ source root로 만들어 준다.
│   ├── manage.py
│   └── mysite  # 같은 이름의 Django 설정 폴더 ➝ config로 rename한다.
│       ├── __init__.py
│       ├── settings.py
│       ├── urls.py
│       └── wsgi.py
└── requirements.txt
✔pycharm 설정
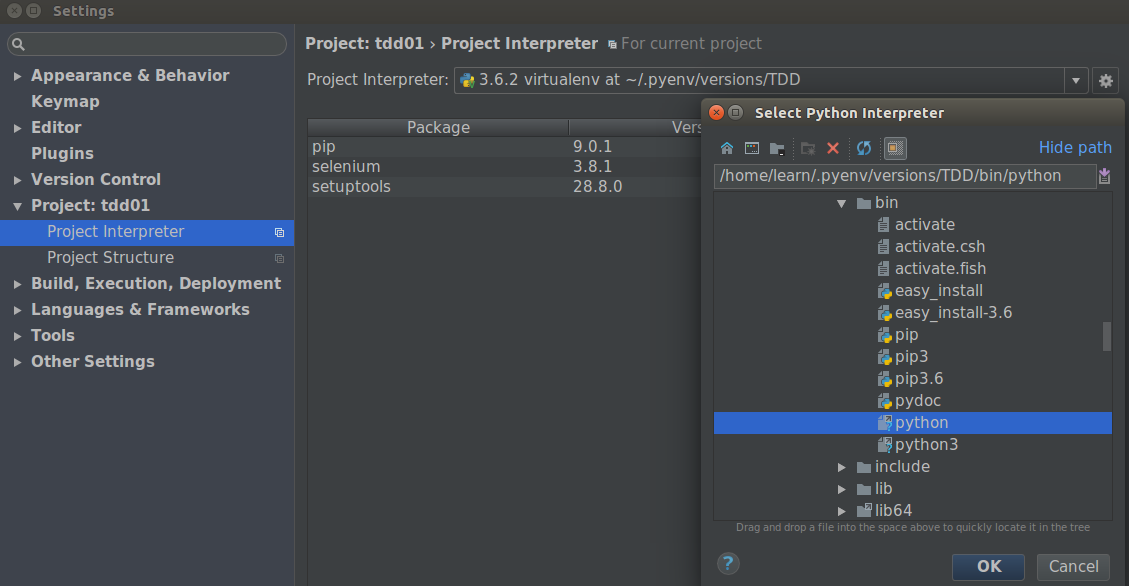
1) pycharm interpreter를 TDD로 설정한다.
- [File] 탭 ➔ [Settings]탭 ➔ [Project] : [Project Interpreter] ➔ ⚙ ➔ [add local] : 화살표 순으로 탭을 클릭하면 입력창이 나타난다.
- 입력창에 위 그림과 같이
/<path-to>/.pyenv/versions/<가상환경 이름>/bin/python을 입력한다.
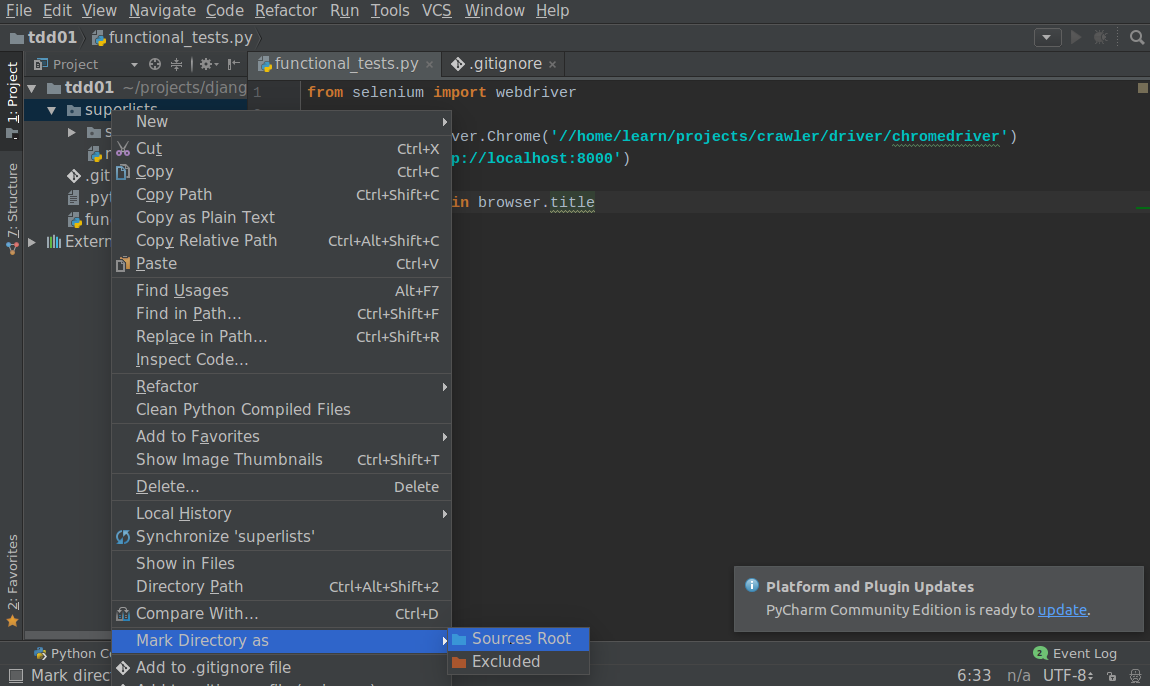
2) source root 설정 - 현재 컨테이너 디렉토리가 source root로 설정되어 있는데, config/setting.py에서 인식해야 하는 root는 컨테이너 디렉토리가 아니라 프로젝트 폴더( mysite )이기 때문에 source root를 새로 설정해야 한다.
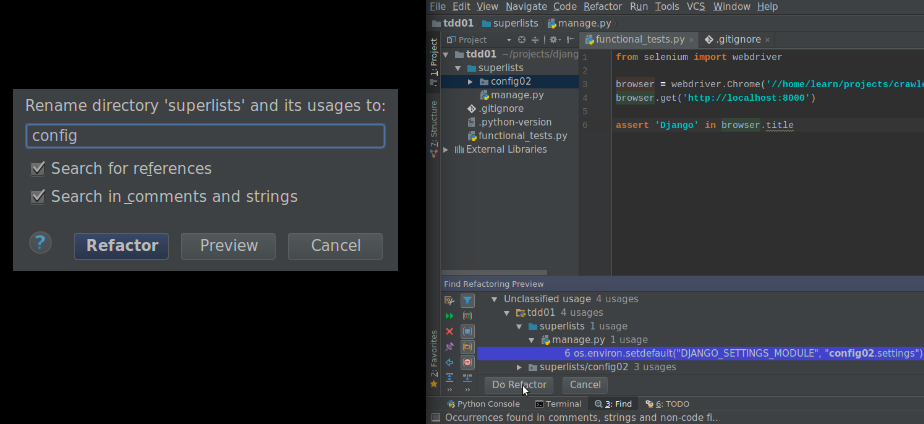
3) rename refactoring - 현재 Django 설정 폴더의 이름이 프로젝트 폴더명과 일치하므로, 서로 구분하기 쉽게 이름을 config로 바꾸어 준다. 아래 그림과 같이,
- 해당 폴더에 오른쪽 마우스를 클릭하여 Refactor탭을 거쳐 Rename을 누르고,
- 입력창에 config라고 입력한후 Refactor탭을 누른다.
- 아래 창에서 Do Refactor탭을 누른다.

runserver 후 FT
➜ ./manage.py runserver
Performing system checks...
System check identified no issues (0 silenced).
You have 14 unapplied migration(s). Your project may not work properly until you apply the migrations for app(s): admin, auth, contenttypes, sessions.
Run 'python manage.py migrate' to apply them.
January 27, 2018 - 17:10:08
Django version 2.0.1, using settings 'config.settings'
Starting development server at http://127.0.0.1:8000/
Quit the server with CONTROL-C.
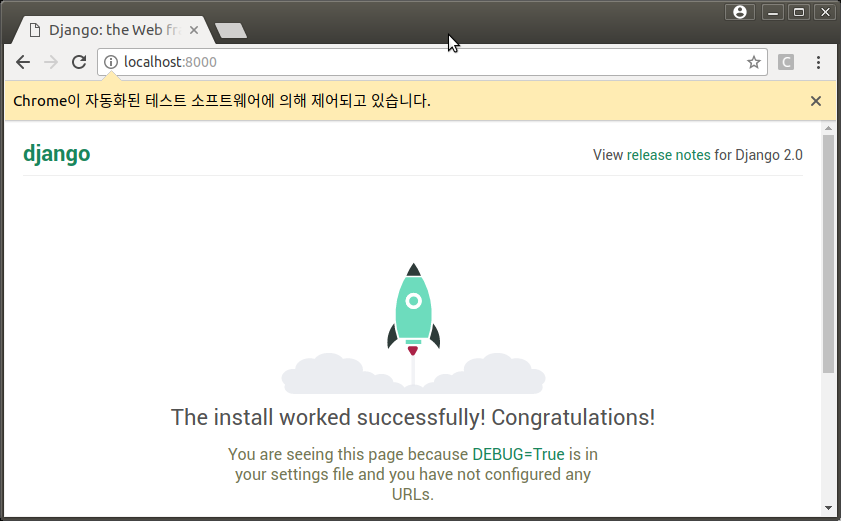
➜ python functional_tests.py
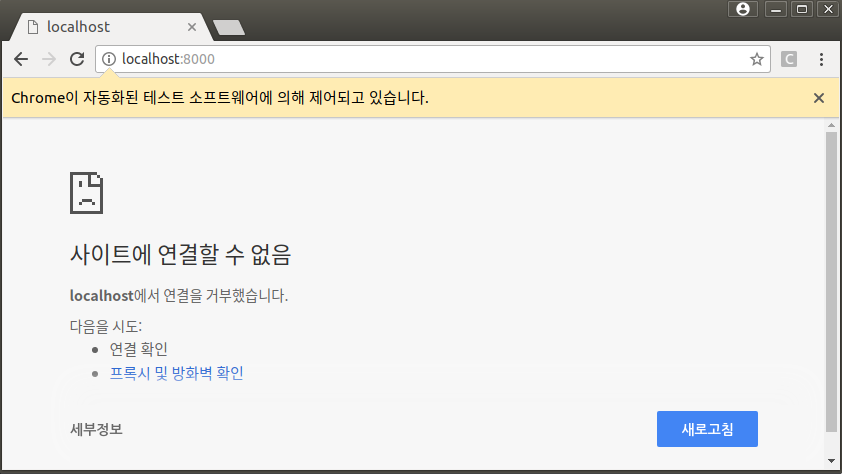
- FT 실행 화면을 보면 다음과 같다.
git 브랜치 워크플로
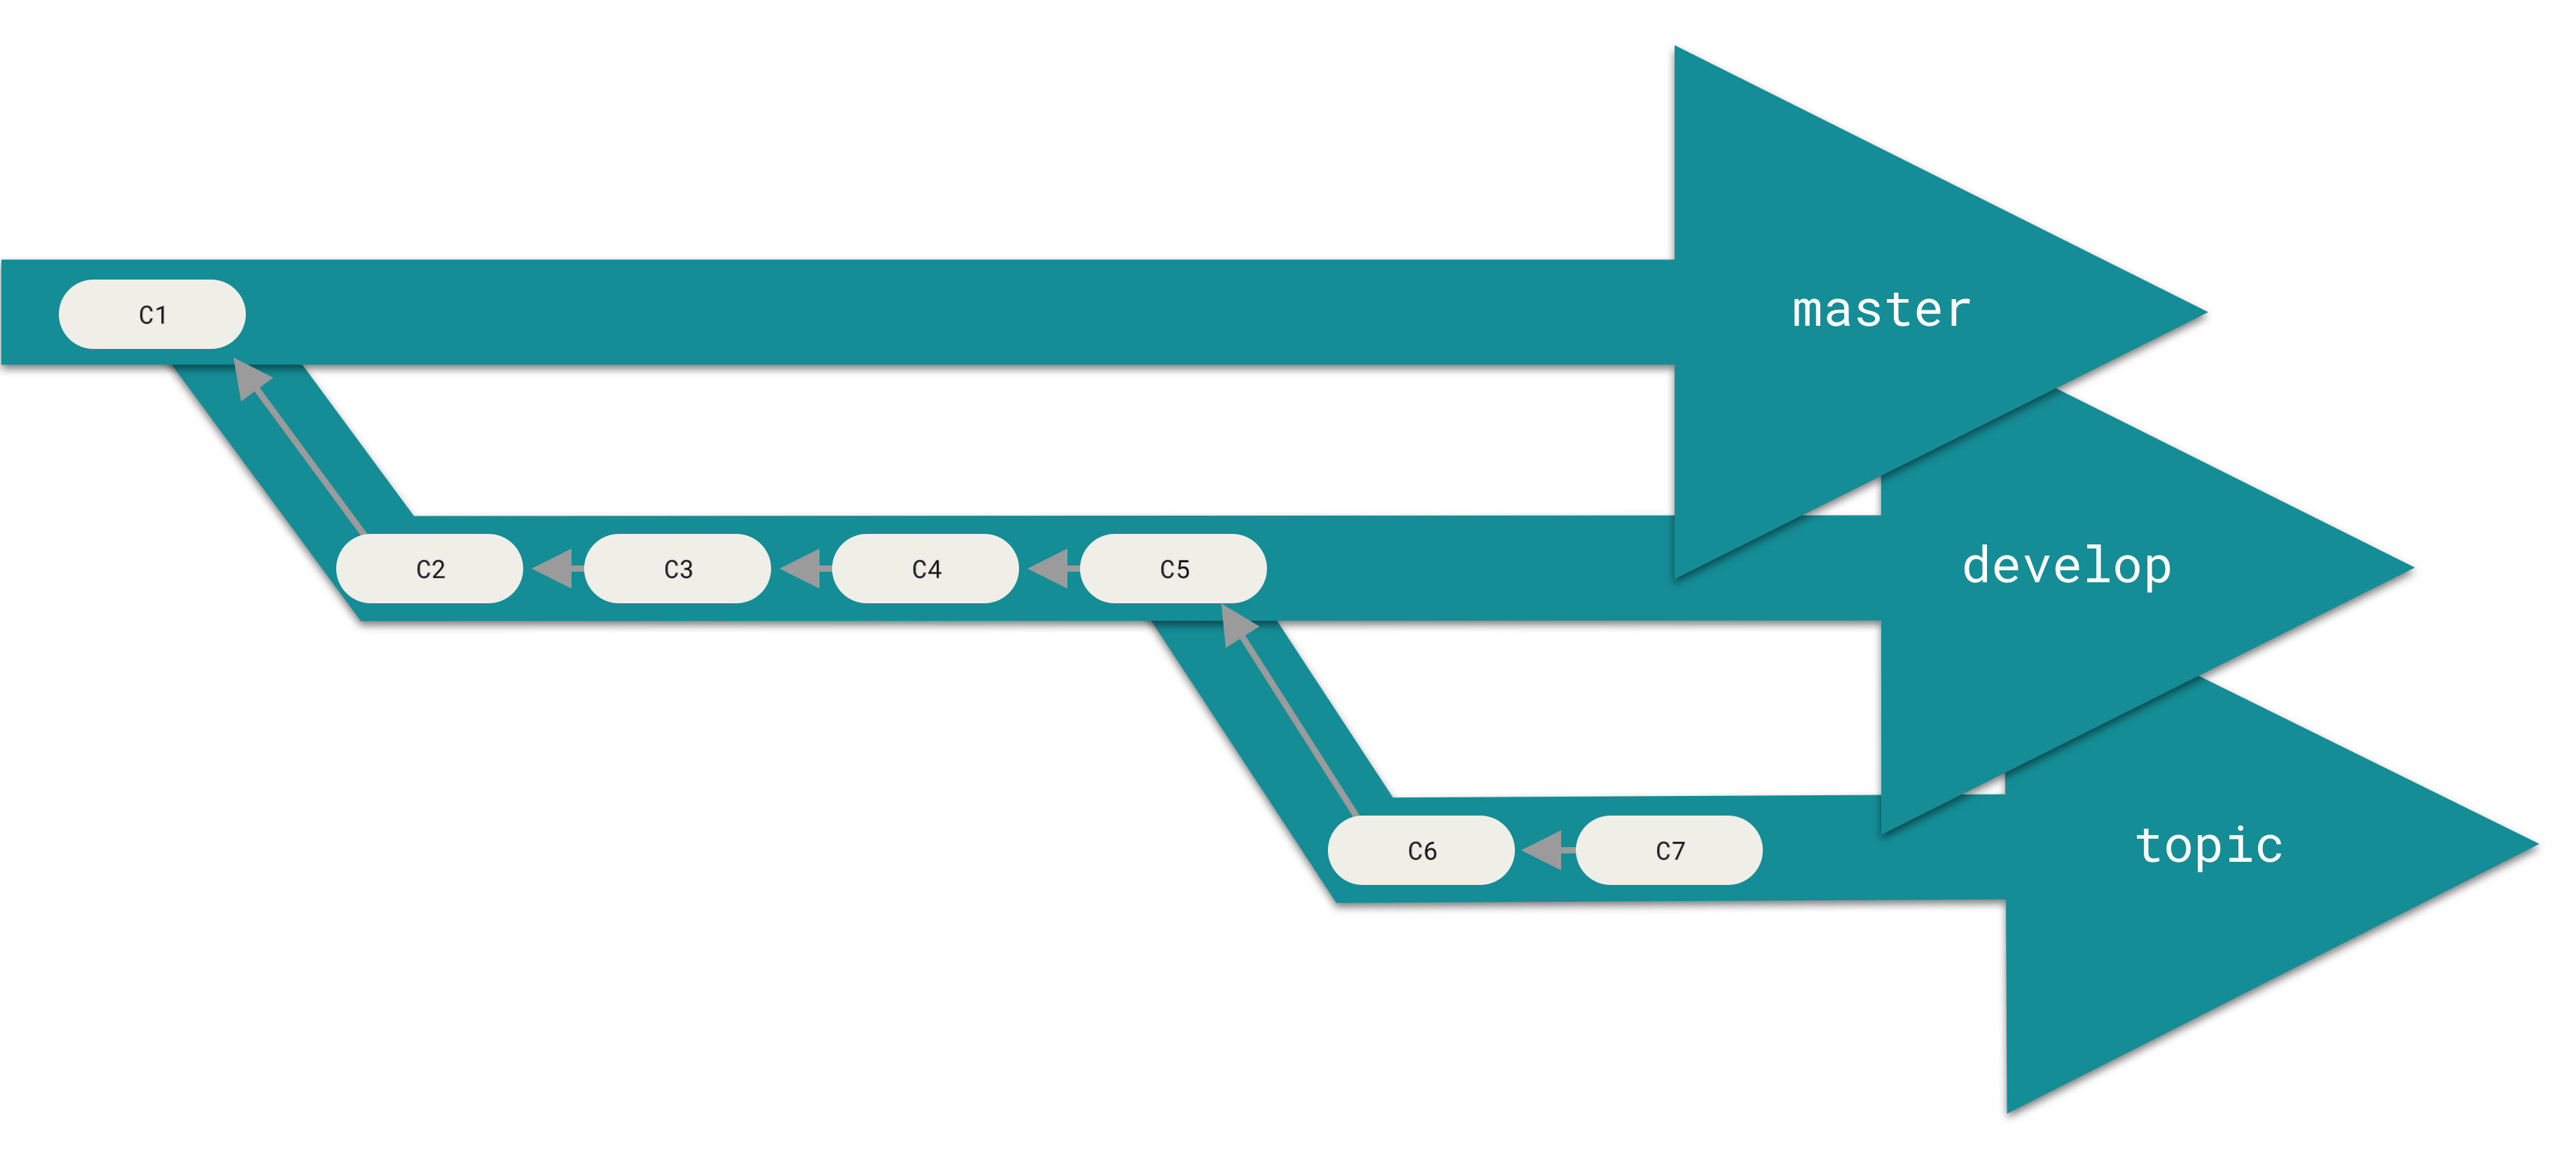
- git branch 관리 ( ⭄ Long-Running 브랜치 )
- 개발 과정에서는 이 브랜치를 주로 사용할 것이고, 주요 이슈 사항마다
iss___브랜치를 따로 만들어 사용할 것이다. - master 브랜치는 안정 버전의 코드만 올린다.
- dev 브랜치는 대체로 안정 버전의 코드를 올리지만 그렇지 않을 수 있다.
iss__,topic__등 토픽 브랜치에서 각 개발 이슈의 처음 code를 올리고, 테스트를 하면서 안정화 시킨다.
- 개발 과정에서는 이 브랜치를 주로 사용할 것이고, 주요 이슈 사항마다
git:(master) ➜  git branch dev
git:(master) ➜  git checkout dev

M       README.md
'dev' 브랜치로 전환합니다


# 브랜치 목록 보기 (마지막 커밋 메시지)
git:(dev) ➜  git branch -v

* dev    8ca3316 환경설정 Django 설치 전 functional_tests.py
  master 8ca3316 환경설정 Django 설치 전 functional_tests.py


# 히스토리 출력
git:(dev) ➜  git log --oneline --decorate --graph --all

* 8ca3316 (HEAD -> dev, master) 환경설정 Django 설치 전 functional_tests.py
* b11a71d (origin/master) 1st commit


git:(dev) ➜  git add -A
git:(dev) ➜  git status
git:(dev) ➜  git commit -m "브랜치 dev생성, Django App - mysite 생성"